Archive for category Microsoft Virtual Server

Microsoft Virtual Server from the Ground Up, Part 5: Comparing Virtual Server vs. VirtualPC

This article was first published on SearchServerVirtualization.TechTarget.com.

People often equate the ability to choose with freedom. That’s usually a good thing, but Microsoft has two virtualization offerings that are both great products at a great price (free). Your options are Virtual Server 2005 and Virtual PC. So which one is better? Well, it depends on what you’re trying to do. In this article, I’ll talk about the differences between these two products, and about how you can switch between them.

A Tale of Two Platforms

If you look at Microsoft’s two virtualization options from a marketing and technical standpoint, there’s one conclusion that seems consistent: Virtual PC has been designed to make virtual machines accessible to desktop users, whereas Virtual Server provides powerful Enterprise-class features. If you’re squarely in one camp or the other, then the decision might be simple. The two products do have a lot in common, but there are some important differences. Let’s take a look at the details.

Virtual PC: Easy Does It

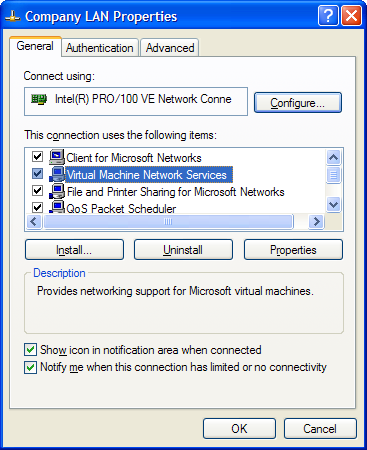
Virtual PC has been designed to be as simple to install and use as possible. That makes it a great solution for people who want to run one or two VMs on their desktops with minimal setup hassles. Perhaps the most noticeable feature is that Virtual PC comes with a standard Windows application for administration. The user interface is familiar and user-friendly (see Figure 1), and most users should be able to get up and running in a matter of minutes (assuming they understand basic virtualization concepts).

clip_image002

Figure 1: Configuring VM hardware settings in Virtual PC.

There are more useful features in the area of administration. A very handy feature is that virtual machine windows can be resized while they’re running (just like you might resize a Word document or e-mail message). As long as the guest OS is supported by the Virtual PC platform, its desktop resolution will scale automatically.

A common task when working with VMs is to transfer files between the host computer and the VM. While you could certainly accomplish this through the use of networking, Virtual PC allows you to simply drag and drop files between the host and guest OS through the use of Shared Folders. Also in the area of networking is the ability to configure Network Address Translation (NAT) to easily share the host’s network connection without worrying about network addresses. Finally, Virtual PC includes an emulated virtual sound card. It may not rock your world, but it can be helpful for testing some applications.

Virtual Server: Power to the [IT] People

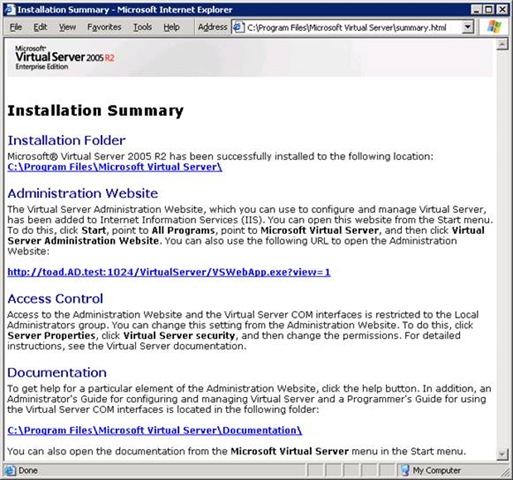
Virtual Server has been designed to host many virtual machines, efficiently and reliably. It runs as a service on Windows XP or Windows Server 2003 computers. Due to its multi-threaded architecture, it can simultaneously run many VMs (assuming you have enough CPU, disk, and memory resources). Virtual Server also supports both 32-bit and 64-bit host operating systems. The most noticeable difference between the two products is that Virtual Server is managed using an Administration Web Site (see Figure 2). While this can be more accessible (all someone needs is a browser in order to manage it), the interface isn’t nearly as user-friendly as a Windows application.

clip_image004

Figure 2: Using the Virtual Server Administration Web Site.

Other than performance, Virtual Server provides numerous additional benefits. One of my favorite features is scripting and automation support through the use of a Component Object Model (COM) interface. The API is well-documented and you can use VBScript, Visual Basic.NET or C# to manage your VMs. As you might expect from any Enterprise product, Virtual Server offers advanced networking and security features. It also provides support for SCSI-based hard disks (allowing terabytes of total storage), iSCSI network-based storage, and clustering (both at the host and guest levels). You can also manage Virtual Server using Microsoft Operations Manager (MOM), or third-party tools.

Feature Comparison

Nothing sums up features and differences like a good table. Figure 3 provides just that.

image

Figure 3: A summary of features of Virtual PC and Virtual Server

The Best of Both Worlds?

If you still can’t decide which platform is best, here’s a reassuring fact: For the most part, VMs are portable between the two platforms. You can create a VM in Virtual PC and then later run it within Virtual Server (or vice versa). This can be very handy in development, testing, support, and other related situations. There are a few things to keep in mind, however. First, the saved state file formats are not compatible between the two platforms. So, you’ll need to completely shut down a VM before you move it between platforms. Virtual Server does not support virtual sound cards (most Guest OS’s will automatically detect this), and Virtual PC does not support virtual SCSI hard disk controllers. The latter is mainly an issue for boot volumes, since you can always take a virtual hard disk file and move it between SCSI and IDE attachments.

Overall, if you don’t mind a bit of a learning curve and you want to host multiple VMs as efficiently as possible, Virtual Server is probably the best bet. If, on the other hand, you just want to run one or two VMs as quickly as possible, then you should probably start with Virtual Server. You really can’t go wrong with either one, since you can change your decision pretty easily and the cost of admission is free. Good luck!

Microsoft Virtual Server from the Ground Up, Part 4: Configuring Virtual Networks in Virtual Server

This article was first published on SearchServerVirtualization.TechTarget.com.

While virtual machines working in isolation can be useful for some purposes, modern day applications and operating systems often rely on network connectivity to accomplish their tasks. The challenge is in finding the right balance between ease of communications and security. In this article, I’ll cover details about virtual networking options in Microsoft Virtual Server 2005. Read on, so you’ll be able to ensure that no VM is an island (unless, of course, you want it to be).

Virtual Server’s Networking Architecture

Let’s start by taking a look at the architecture of how Virtual Server handles network access. Figure 1 provides a high-level view. Starting from the bottom, you have your physical network – the actual cables, switches, routers, and other devices to which the host computer is connected. Above that is the host’s physical network interface card (NIC) and its associated driver. That’s the standard stuff. Virtual Server adds a layer called the “Virtual Machine Network Services Driver”. It’s the responsibility of this layer to allow virtual NICs (which are configured within the VM) the ability to access the physical network.

clip_image002

Figure 1: An overview of Virtual Server’s network architecture

In the simplest configuration, you’ll likely have only a single physical NIC and a single virtual NIC. However, Virtual Server supports as many host NICs as you can install on the host OS, and up to four virtual NICs within each VM.

Understanding Virtual Networks

Virtual Networks are created within Virtual Server to simplify the administration of networking options. One option is not to attach the VM’s NIC to any virtual network (or to not use a virtual NIC at all). In that case, the VM will not be able to communicate with other physical or virtual machines. If you do want to enable communications, there are two main types of virtual networks options.

Guest-Only Networks

A good way to minimize network security risks is to create a virtual network that restricts virtual machines to talking only to each other. Figure 2 shows an example. You can create many different Guest-Only networks, simply by choosing not to bind them to any of the host’s physical network adapters.

clip_image004

Figure 2: A logical overview of Guest-Only virtual networks.

External Networks

When you choose to connect a host network adapter to a virtual network, all VMs that are connected to that network will act as if they were physically connected to the host’s LAN (see Figure 3). In fact, other computers on the same network will have a hard time distinguishing that these machines are VMs. While this offers the best connectivity, it comes at the risk of security (you must ensure that your VMs are properly patched and secured), and manageability (VMs must use compatible network addresses).

clip_image006

Figure 3: A logical overview of Guest-Only virtual networks.

Creating Virtual Networks

The good news is that, once you understand Virtual Server’s networking architecture, creating and managing virtual networks is pretty simple. First, let’s look at how you can place limits on which physical network connections can be used.

Enabling Host Network Adapters

It’s not uncommon for server-side computers to have multiple physical network adapters. This is often done to segment traffic (for example, in the case of a public web server), or for performance (for example, creating a separate network connection for performing backups). In these cases, it’s likely that you’ll want to tell Virtual Server that one or more network interfaces is “off limits” for VMs. You can do this by editing the properties of the appropriate network connection and unbinding the Virtual Machine Network Services item (see Figure 3). The rules are simple: If the box is checked, then virtual networks will be able to use the physical adapter. If not, the network connection will not be available.

clip_image007

Figure 4: Configuring the Virtual Machine Network Services item in the properties of a host network adapter.

Managing Virtual Networks

OK, now that we have all the pre-requisites out of the way, it’s time to fire up the Virtual Server Administration Web Site. By clicking on the items in the “Virtual Networks” Section, you can create and configure virtual networks. Figure 5 shows the screen you’ll see when creating a new virtual network. The name of the virtual network can be anything descriptive. Next, you can choose whether you want to bind the network to one of the host’s physical network adapters, or if you want to create a guest-only network. Finally, this page will automatically list all virtual network adapters that are not currently connected to a virtual network and will allow you to connect them directly. Click OK, and your virtual network should be ready for use.

clip_image009

Figure 5: Create a new virtual network.

Configuring VM Network Adapters

You can connect virtual network adapters to virtual networks by editing the configuration of an existing VM. Figure 6 shows the configuration of a VM that has multiple virtual NICs. Note that you can specify a static MAC address, or you can have Virtual Server automatically create one that will avoid conflicts. The best news is that you can connect and disconnect virtual network attachments even while the VM is running (just be sure that your OS and applications are OK with this).

clip_image011

Figure 6: Modifying virtual network adapter properties for a VM

More Virtual Server Networking Features

In this article, I covered the basics of getting up and running with Virtual Server’s networking options. But wait, there’s more! Virtual Server includes a built-in DHCP server that can be used for each of your virtual networks. As with physical network environments, this can help to greatly simplify the management of network addresses (especially if you often copy or move VMs). Of course, if your VMs are participating on the host network, you can use DHCP and other network services that might already be available.

Both Windows XP SP2 and the Windows Server 2003 platform offer built-in firewall functionality, and an Internet Connection Sharing (ICS) feature. Both of these are available for you to use with your VMs through an interesting application of the Microsoft Loopback Adapter (see Virtual Server Books Online for more details).

Overall, Virtual Server’s networking architecture is flexible and easy-to-manage, once you know how it all works. Keep this information in mind when you’re trying to determine the best balance between communications and security for your VMs.

Microsoft Virtual Server from the Ground Up, Part 3: Installing a Virtual Server Guest OS

This article was first published on SearchServerVirtualization.TechTarget.com.

If you’ve been following the article series so far, you’ve already setup Microsoft Virtual Server, configured some basic server settings, and have created a new VM. What’s missing in this picture? Well, so far, the VM doesn’t do much – you can start it, but all you’ll get is a black screen stating that no operating system can be found. That makes sense – so far, you have the equivalent of a physical computer with a blank hard drive. The next logical step is to install a guest operating system. You’re in luck, as that’s the topic of this article!

Guest OS Installation Overview

The process of installing a guest operating system is similar to that of installing an operating system on a new physical machine. You need to start with some way of getting the OS installer (and all related files) onto the computer. In the old days, you’d likely use floppy disks. Now, CDs, DVDs, and network-based installs are more common. Literally hundreds of operating systems have been successfully run with Virtual Server (though only a small subset of them are officially supported by Microsoft). In general, as long as your guest OS supports the hardware configuration shown in Figure 1, you should be able to run it within a Virtual Server VM.

image

Figure 1: The virtual hardware configuration for a Virtual Server VM.

The main concept to keep in mind is that, in almost every way, the guest OS will function like a physical one. It has a BIOS, it performs a POST operation, and it enumerates removable drives and fixed hard disks during the boot process. You can even go into the BIOS to make changes (though the default options will probably work best). OK, with that out of the way, let’s look at installation options.

Guest OS Installation Options

On a physical machine, you’d most likely start the installation of a new OS by inserting a CD or DVD into the system. Since there are no physical drives for a virtual machine, you’ll need to attach your VM’s virtual DVD-ROM drive (which also supports CD-ROMs) to the appropriate media. To manage these attachments, simply choose to edit the configuration of your virtual machine using the Virtual Server Administration Web Site. Let’s look at the three most common methods.

Installation Using Physical Media

If you have a physical CD-ROM or DVD-ROM from which you can install your guest OS, the simplest approach is to “capture” host computer’s physical DVD-ROM drive to your VM’s virtual DVD-ROM drive. To do this, go to the configuration of your virtual machine and then click on the “CD/DVD” link. As shown in Figure 2, you’ll have several options. Just select “Physical CD/DVD drive” and choose the appropriate drive letter from the host.

image

Figure 2: Capturing a physical CD/DVD drive.

The next time the VM is booted, it should automatically detect the media as if it were mounted in a virtual DVD-ROM device. Assuming that the media is bootable, you’ll be off and running with the Guest OS installation process. This is a pretty simple process, but there’s one catch: Using physical media can be a very slow method of installing an OS. Also, only a single VM can capture a physical host drive at a time (a problem if you’re planning to run multiple installations in parallel). Fortunately, there’s another option.

Installation Using ISO Files

The ISO standard specifies a method by which disc-based media formats (like DVDs and CDs) can be represented in a file. You can create an ISO file using various third-party utilities, and it has become very common for OS distributions to be available for download in ISO formats. If you have an ISO file, you can easily make it available for use by a VM, as shown in Figure 3.

image

Figure 3: Attaching to an ISO file to a VM’s Virtual CD/DVD drive.

Installing from an ISO file is usually significantly faster than using physical media, and multiple VMs can attach to the same ISO file at the same time.

Network-Based Installations

The Pre-boot eXecution Environment (PXE) standard allows for computers to be booted over a network. There are several requirements for this to work properly. First, the virtual network card must support PXE booting. Virtual Server has you covered here (as long as you’re using Virtual Server 2005 R2 or later). The other is that a collection of server-side technologies need to be available. Various vendors (including Microsoft) have PXE-based installation methods for their operating systems.

Using the VMRC

Once you’ve captured the appropriate media for installation, all you need to do is start the VM and use the VMRC to connect to it from within the Virtual Server Administration Web Site. Both operations can be performed by clicking on the thumbnail of the VM in the “Master Status” page.

Completing the OS Installation

Obviously, the exact steps for performing an OS installation will vary based on the specific OS. Again, keep in mind that the process should be similar (if not identical) to that of installing on a physical machine.

The first step that you’ll want to perform after the OS installation is complete is to install the Virtual Machine Additions. This package includes drivers and related software that will greatly improve VM performance and usability. The easiest way to do this is to click the “Install VM Additions” link when using the VMRC. Behind the scenes, Virtual Server will automatically mount the appropriate ISO file and (if your OS supports it), will automatically start the installation process. Once you reboot the VM, you should be all set to do what you will with your new VM.

Virtualization Checkpoint

In the first three articles in this series, we’ve gone through the process of setting up a new VM and getting it ready for use with a guest OS of your choice. In future articles, I’ll cover details related to other configuration options such as configuring virtual networks. Stay tuned!

Microsoft Virtual Server from the Ground Up, Part 2: Creating Your First Virtual Server VM

This article was first published on SearchServerVirtualization.TechTarget.com.

In the first article in this series, we walked through the process of installing Microsoft Virtual Server 2005. That process set the stage for the real task: Creating and managing virtual machines. In this article, I’ll walk through what you need to know to create a new VM.

Configuring Virtual Server Settings

While you could start creating VMs immediately after the installation of the Virtual Server service, it’s worth taking some time to examine and customize some basic server settings. If you want to play along at home, start by launching the Virtual Server Administration Web Site (I’ll provide screenshots if you’d rather just sit back). While there are many different configuration options that might be important, in this article, I’m going to hit the highlights (settings that most Virtual Server administrators will want to change).

Enabling the VMRC Server

The Virtual Machine Remote Control (VMRC) Server is a process that allows users to connect directly with virtual machines. This is usually most important during the guest OS installation process. For security purposes, the VMRC Server is disabled by default. To enable it, click on the “Server Properties” link under “Virtual Server” in the left navigation bar. Then, click on the VMRC Server link.

Here, you’ll be able to configure many different settings, including the TCP port number, on which network interface(s) the VMRC server will respond, default screen resolution, and supported authentication methods (see Figure 1). To allow connections, check the Enable checkbox and click OK. You’ll now be able to connect to VMs using the VMRC client application or directly through the Virtual Server Administration Web Site.

image

Figure 1: Configuring VMRC Server options for Virtual Server.

Configuring Search Paths

By default, Virtual Server will create new VM-related files within a folder buried beneath the local “Documents and Settings” folder. It’s almost always better to create your VMs in another file system location. In order to change these settings, again click on “Server Properties” in the Virtual Server Administration Web Site and then select “Search Paths”. Figure 2 shows the options that are available.3

image

Figure 2: Configuring Virtual Server search paths.

The two settings are:

  • Default virtual machine configuration folder: This is a single file system path that specifies where new virtual machines will be created. Be sure to choose a path on a volume that has plenty of free disk space. You can always override this location, but keeping VM-related files in an organized location will pay off in simplifying administration.
  • Search paths: Here, you can enter a comma-separated list of file system paths. This option is provided mainly for convenience: When you’re working with VMs and related objects, the Virtual Server Administration Web Site will automatically look in these paths for files. You can always manually type the path names, but it’s much easier to just select appropriate objects from a list.

When you click OK, Virtual Server will attempt to verify the file system locations that you’ve specified. If the paths or folders don’t exist, you’ll receive a warning. You can always change these file system locations in the future (just note that Virtual Server will not move any files – you’ll have to do that yourself).

Creating a New Virtual Machine

With the basic server settings out of the way, it’s time to create a new virtual machine. While you could manually created virtual hard disks (VHDs) and VMs, Virtual Server provides a shortcut. The process is easy enough using the Virtual Server Administration Web Site: Just click on “Create” in the Virtual Machines section. Figure 3 shows the available options.

image

Figure 3: Creating a new virtual machine.

Incase you’re worried, rest assured that all of the decisions you make here can be changed later. Here’s a quick overview of the information you’ll need to specify:

  • Virtual machine name: This is the name of the virtual machine you are creating. It’s a good idea to use a description of the configuration of the VM. Examples might be, “Windows Server 2003 Enterprise Ed.”, or “RedHat Test Workstation”). Virtual Server will use these names for the folder name and the name of the initial virtual machine configuration (.vmc) file and, optionally, virtual hard disk (.vhd) file that it creates. Note that if you want to create the VM in a location other than the default Virtual Server path, you can type the fully-qualified path in this box.
  • Memory: This box will allow you to specify the total amount of physical memory that will be committed to the virtual machine. A good rule of thumb is to use at least the minimum that you would have in a physical machine that was designed to run the intended guest OS. You can always change the setting later.
  • Virtual hard disk: In this section, you can choose to create a new virtual hard disk (VHD). This is the simplest option, as it allows you to specify the maximum size of the VHD and whether it should be connected to a virtual IDE or SCSI controller. The physical file that is created will initially be small but will expand as space is required by the Guest OS. Since the maximum size cannot be directly changed, it’s a good idea to use the 16GB recommendation. You can also attach an already-existing VHD, or choose to create the VM with no VHD at all.
  • Virtual network adapter: Here’s where you can determine the type of network connectivity you want the VM to have. By default you’ll have the option of internal network (specifying that VMs will only be able to talk to each other), or external network (which will allow the VM to participate on the host’s LAN connection). I’ll cover the options in detail in a future article. If you’re not sure what to choose, “Not connected” is a safe bet (you can always attached to a network later).

Once you’ve provided the necessary details, you can click the Create button to define the VM. Virtual Server will create the necessary files, and you’ll see your new VM in the “Master Status” page of the Administration Web Site.

Configuring VM Hardware Options

So far, you’ve only included the bare minimum that’s required to create a basic VM. You can also view further details about the hardware configuration of the VM by clicking on “Configure” in the “Virtual Machines” section of the Administration Web Site. As shown in Figure 4, you’ll be able to make changes such as changing the amount of memory allocated to the VM, changing its name, modifying virtual network adapters, adding virtual hard disks, etc. I’ll cover several of these options in future articles.

image

Figure 4: Viewing a VMs virtual hardware configuration.

Next Steps

Now that you’ve configured Virtual Server and created your first VM, you’re ready for the process of installing a guest OS. I’ll cover that topic in the next article.

Microsoft Virtual Server from the Ground Up, Part 1: Installing Virtual Server

This article was first published on SearchServerVirtualization.TechTarget.com.

Series Introduction

It’s hard to read about IT management these days without hearing about virtualization. Chances are good that you’ve heard about the many features and benefits of using virtual machines. But, you might not know how to get started. That’s where this article series comes in.

Microsoft Virtual Server 2005 is an excellent platform for hosting your VMs, and it’s quick and easy to get started. If you haven’t installed the product and tried it out already, a tutorial that walks through the process “from the ground up” might be just what you need to get started. In this series, I’m going to walk through the basics of working with Microsoft Virtual Server 2005. In this article, I’ll begin with the crucial first step: Installing and configuring the product.

Virtual Server Requirements

So, you’ve heard a lot of about virtualization, and you’re convinced that you should give Microsoft Virtual Server 2005 a try. The first question you’re likely to have is, what do I need to be able to run Virtual Server? Without getting into all of the details (which you can find on Microsoft’s Virtual Server System Requirements page), you’ll need to be running an edition of Windows Server 2003 (both 32-bit and 64-bit systems are supported) or Windows XP SP2. The latter is recommended for non-production use (such as testing and development), but will work just fine.

As long as your hardware is supported by your choice of OS, you should be able to run Virtual Server. From a memory standpoint, the rule is simple: The more, the better. And, you’ll need at least a few gigabytes of disk space to host your VMs. Details will be based on how many VMs you plan to support, and the amount of resources they’ll require.

Virtual Server Architecture

In order to fully understand how Virtual Server works, it’s important to take a look at the overall architecture of the product. Figure 1 provides an overview. The first important aspect to note is that the Virtual Server service (which runs within the host OS) is responsible for creating virtual environments in which your Guest OS’s will run. That’s the heart of the product. Like most Windows services, this process can be started and stopped after it is installed.

clip_image002

Figure 1: A logical overview of the architecture of Microsoft Virtual Server.

The next important aspect is the Virtual Server Administration Web Site – the primary method by which you will interact with the Virtual Server service. This site runs within Internet Information Services (IIS). In the default configuration (which we’ll cover in this article), you will need to have IIS installed on the machine on which the Virtual Server service is installed. It is also possible to install the Administration Web Site on another computer for security, performance, or management purposes.

Installing Virtual Server

OK, enough of the background – let’s get to the hands-on portion. With all of the pre-requisites out of the way, it’s time to walk through the process of actually installing the Virtual Server product. You can obtain the Virtual Server installation package as a free download from the Microsoft Virtual Server web site. Start the installation process by running the executable on that computer on which you want to install the Virtual Server service.

One quick warning: During the installation process, the host computer’s network connection will be dropped and then reconnected. Usually, the interruption is short (and a Remote Desktop session should automatically recover), but keep this in mind if you’re in the middle of transferring a 42GB file over the network.

Here’s a guided tour of the setup process (I’ve omitted “easy” questions like user name and company):

1) Setup Type: In general, you’ll want to choose the Complete option, which will install the Virtual Server service, documentation, and the Virtual Server Administration Web Site. If you are planning to support numerous Virtual Server installations, you might choose not to install the Virtual Server Administration Web Site or other components by using the Custom option.

2) Configure Components: On this screen (shown in Figure 2), you must specify the TCP port number on which the Virtual Server Administration Web Site will respond. The default (TCP port 1024) is applicable to most installations. If you change it from the default, all users of the site will need to be made aware of the port number in order to connect. If you’re installing on Windows XP, you will not be given a choice of port numbers (since the Windows XP version of IIS only supports a single web site). Instead, a new virtual directory will be created.

clip_image003

Figure 2: Specifying the TCP port for the Virtual Server Administration Web Site.

You must also specify the security context under which the Administration Web Site will run. The recommendation is to run as the authenticated user, which means that the site will have the permissions of the user that is connecting. This is the simplest option for most installations. If you need to use constrained delegation (which allows you to access and share resources across multiple servers), you can choose the “Local System Account” option. Rest assured that you can change these settings later.

3) Windows Firewall Exceptions: The installation process will offer to place exceptions in the Windows Firewall list to support the configuration. Unless you’re planning to administer Virtual Server only from the local machine, it’s a good idea to accept the offer.

4) Installation Summary: Once you’ve completed the installation, you’ll see an Installation Summary page (see Figure 3). Be sure to make a note of the URL for the Virtual Server Administration Web Site. Other users will need this information to connect to administer the server from another computer.

clip_image005

Figure 3: Viewing the Virtual Server Installation Summary page.

If you want to remove Virtual Server for some reason, you can do this using the Add/Remove Programs applet. The process won’t delete your virtual machine files, but it will uninstall the Virtual Server service and the Administration web site. As you can see, the process couldn’t be much simpler.

Connecting to the Virtual Server Administration Web Site

To verify that the installation is working properly, you can use the “Virtual Server Administration Web Site” link in the Microsoft Virtual Server program group, or you can open an instance of Internet Explorer and navigate to the site’s URL directly. Figure 4 shows a typical display that includes some VMs. Note that, the site uses ActiveX controls and IE-specific settings, so you’ll need to use this browser for administration. When connecting, you’ll be prompted for authentication information, and any domain or local user that has permissions to connect to the site will be able to continue.

clip_image007

Figure 4: Accessing the Virtual Server Administration Web Site

During installation, the setup process creates a new “Virtual Server” event log, which you can view using the Administration Web Site or through the Windows Event Viewer application. It’s a good idea to look for any warnings and errors that might have occurred during the installation process. In most cases, though, you’ll be all set to start working with the server right away.

In the next article in this series, I’ll cover details related to configuring Virtual Server and (the point of all of this): Creating your first VM.